

Setup & usage guide
Azure Git Listener is available for all Jira Cloud installations. Sign in to your Jira account, open the Azure Git Listener for Jira page on the Atlassian Marketplace, and click Install.
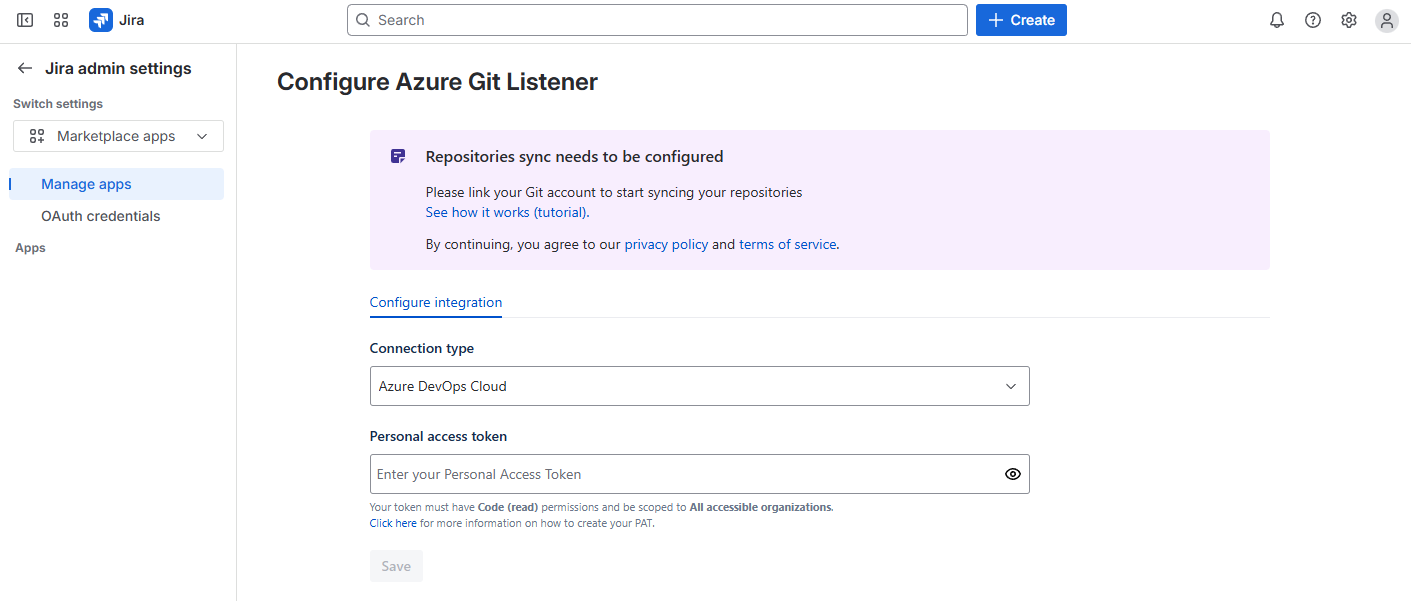
After installation you'll be prompted to configure Azure Git Listener. You can also reach the configuration page at any time from your organization's app management page — open Connected apps, find Azure Git Listener, and choose Configure.
To link your Azure repositories, select your Azure DevOps instance type (Cloud or Self-hosted), enter your Personal Access Token (PAT), and click Save. The token must include Code (Read) permissions and be scoped to All accessible organizations.
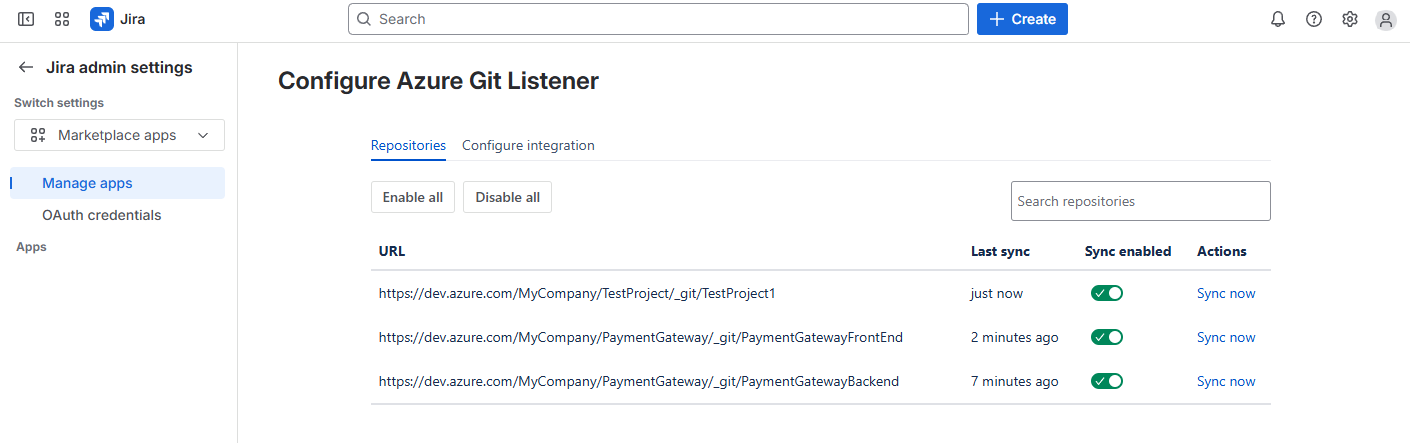
Azure Git Listener automatically detects the repositories your Microsoft account can access and lists them on the configuration page. Choose which repositories to link and view when each was last checked for updates. To update or replace your PAT, return to the configuration page and update your integration settings.
Use scoped, least-privilege tokens. Azure Git Listener reads metadata only and never clones your code. See the security overview.
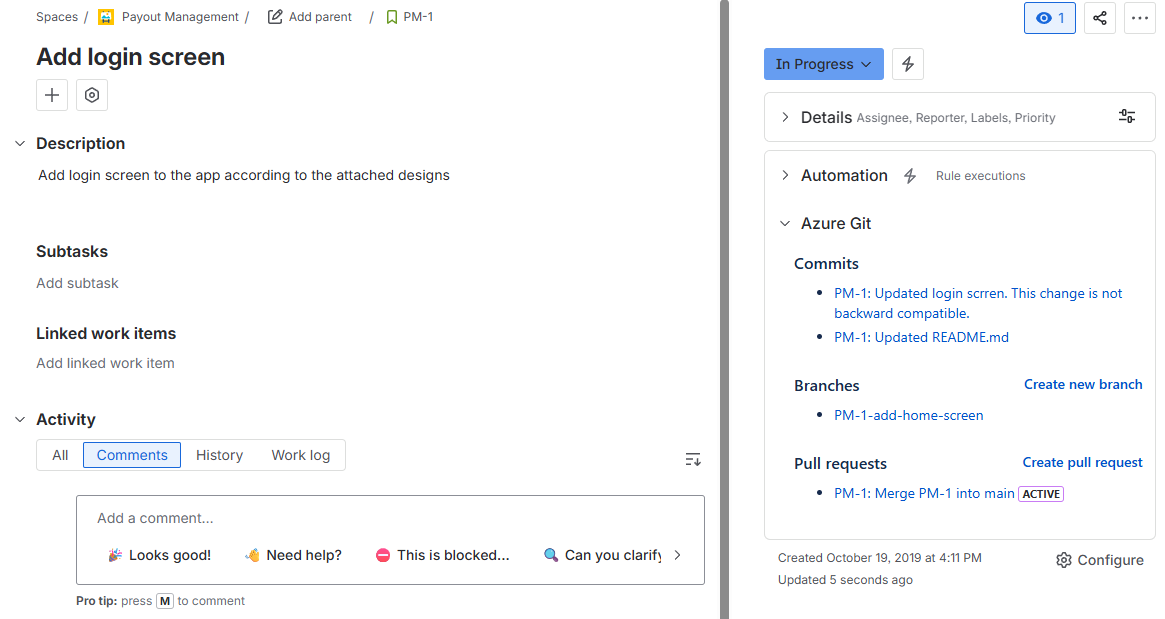
Once configuration is complete, open any issue in your Jira project and you'll see the Azure Git panel on the right. Expanding it shows all commits, branches and pull requests associated with the issue.
Linking is performed using issue keys (e.g. PROJ-123) — include the issue key in commit messages, branch names and pull-request titles so items are detected correctly.
If you have any questions or need assistance, please contact us via our feedback form.
Pick the platform you work in — every plan includes a free trial on the marketplace.


 AWS
AWS GitLab